5 Steps to Watch Disney+ USA Anywhere in the World
We provide you with a simple and detailed step-by-step guide on how to unblock content that is only available on Disney U.S. In our article, you’ll also find helpful tips and tricks to make watching more convenient and troubleshoot potential problems you might encounter when trying to unblock U.S. content on Disney. There is a reliable solution that will allow you to enjoy the content of this popular streaming platform regardless of your current geographic location.
A simple solution is to use a virtual private network (VPN). This network establishes an encrypted connection between your device and the internet through a VPN server located in another geographic location, in our case specifically in the US. All of your online traffic is routed through this server, allowing you to change your virtual location and hide your real IP address along with your current location.
Among our top 10 best VPNs for Disney , NordVPN clearly stands out as the best service. This service is recognized for its high level of security, speed, rich feature set, and a network of servers that is spread across the globe. For more information, check out our NordVPN review.
A quick guide on how to unblock Disney+
-

Step 1: Purchase of NordVPN
Subscribing to the service is easy, just a few clicks on the NordVPN website. You can choose an ongoing paid monthly subscription or a longer subscription.
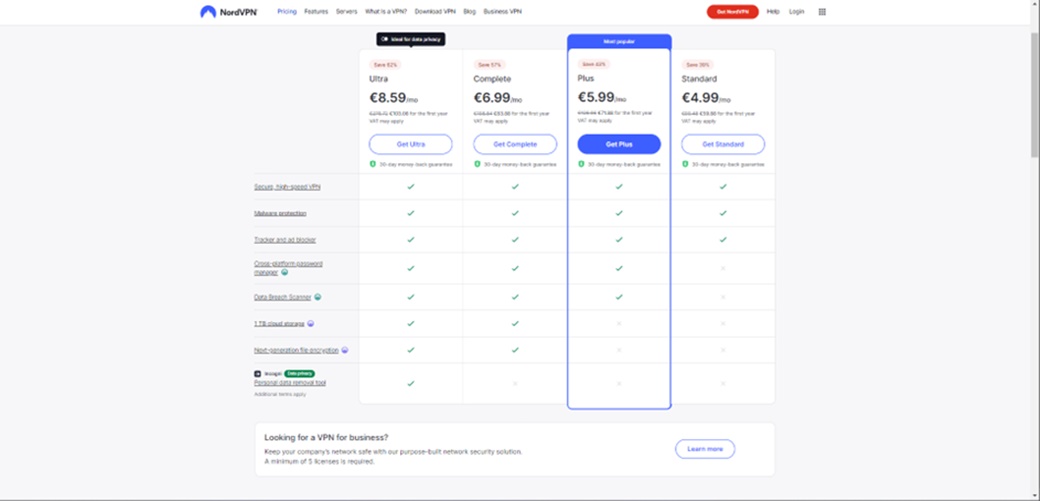
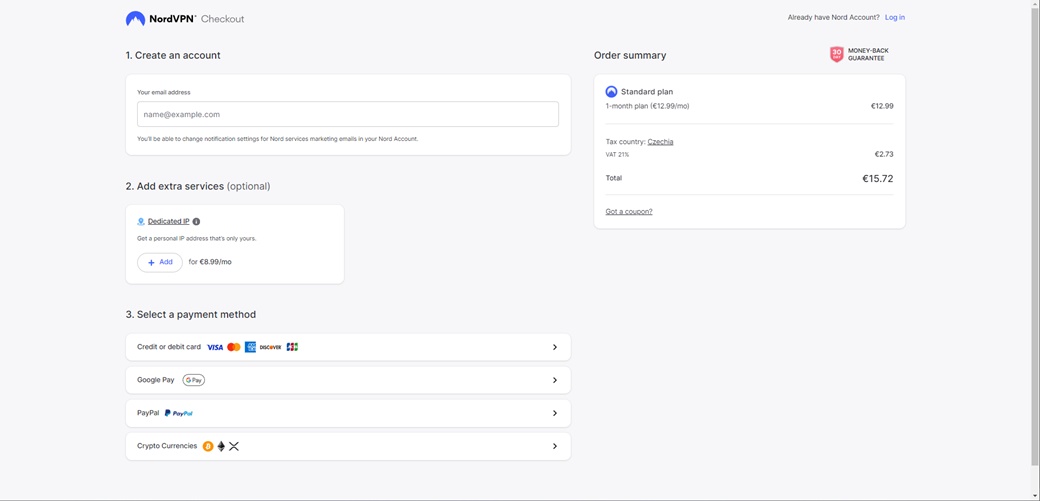
All available plans are listed on the NordVPN. After selecting a plan, simply enter your email address, which you will then use to log in. You then choose your preferred payment method, which comes with a money-back guarantee for 30 days from the time of purchase. We have verified the money-back guarantee for you.
-
Step 2: Install and Download NordVPN
Once you’ve successfully made your payment, NordVPN will automatically redirect you to a page where you can download the app for your device. If you are not automatically redirected, you have the option to download the app from the NordVPN website. Once you click on the “download” button, the download will begin and once it is complete, you can proceed to install the app. During the installation process, you will have the option to choose the location of the app, create an icon on your desktop and add the app to the Start menu.
-
Step 3: Create an account with NordVPN
After installing and launching the app, it is essential to sign in using the email you provided during the first step of the purchase process. After clicking the “Log in” button, you will be redirected to a page where you will enter your email. You will then receive a verification code in your email inbox, which you will enter in the appropriate field. After successful verification, you must create a password for your account.
-
Step 4: Connect to the NordVPN server
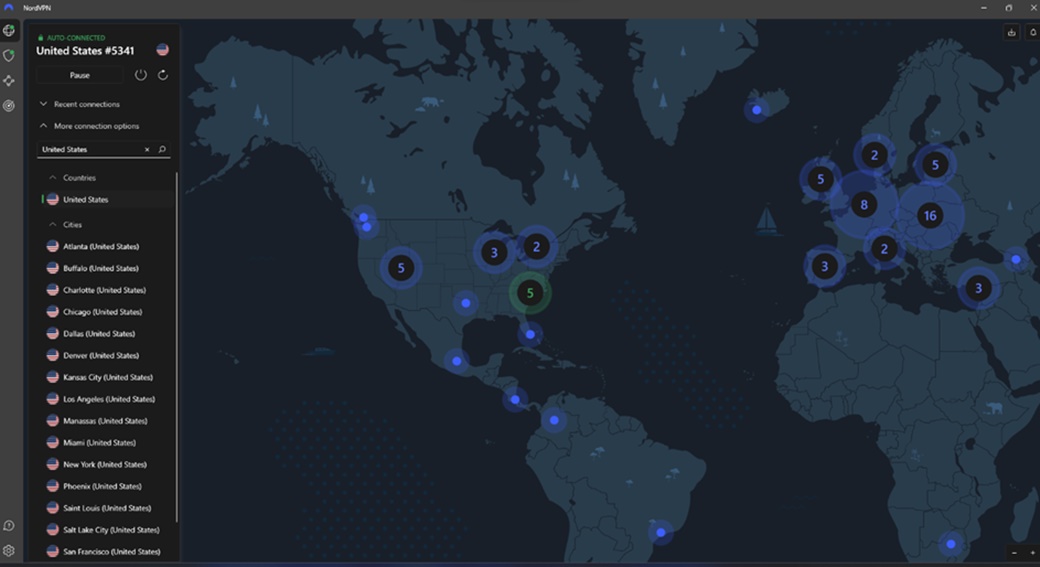
After you have created your account and launched the app, click on “More connection options” and type “United States” in the search box. Once you’ve found the servers, just click on a country in the list or on the map and NordVPN will automatically connect you and change your virtual location to the US.
-
Step 5: Watch US Disney+ with NordVPN
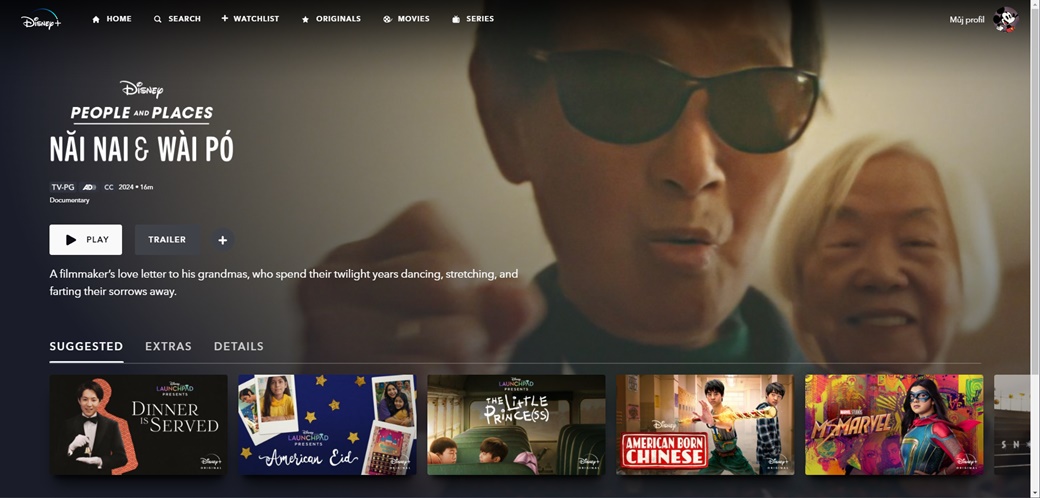
Now it’s time to launch Disney+ and check if you have successfully unblocked the content available available in USA only. When you log into your Disney+ account and select the profile you want, you’ll see a ‘Looks like you’re travelling!’ pop-up. Click the ‘OK’ button below this notification and you are now ready to start watching US content on the Disney+ platform.”
Detailed instructions on how to unblock Disney
-
Purchase NordVPN
At NordVPN website, first choose the subscription option that suits you best.
The monthly plan gives you the flexibility to pay every month, but at a higher price $13.85.
A longer-term subscription offers a more attractive price $4.04 per month in exchange for a two-year payment commitment.
After choosing the length of your subscription, you can choose from packages: Ultra, Complete, Plus and Standard. For access to American Disney+, the Standard version is sufficient.
After choosing a plan, you enter your email address, which you then use to sign up for this service. You can then choose your preferred payment method, all of which are backed by a money-back guarantee for 30 days after purchase. We have also verified the money back guarantee for you.
-
Download the NordVPN app
Once you’ve successfully completed your payment, NordVPN will automatically take you to a page where you can download the app installer file for your device. If you weren’t automatically redirected, you can download the app on the NordVPN website.
After pressing the “Download” button, select the location where the installation file will be saved on your device. However, there is no need to change the preset location.
Once you have chosen a location to save the file, the download will begin. Once the download is complete, open the downloaded file and start the NordVPN app installation.
-
Installing the NordVPN app
After downloading and opening the app installation file, click “Yes” to grant the NordVPN app permission to make changes on your device. This step is crucial for the app to work properly.
You will then be presented with an installation process window where you have the option to select the location of the app and files. If you don’t want to change the default location, you can proceed with the preference and click “Next”.
Then the installation preparation will take place, during which the necessary files for installation will be downloaded.
You then have the option to choose whether you want to create an icon on the desktop and in the Start menu. These options are optional and you can customize them according to your preferences. After clicking “Next”, you can again proceed with NordVPN‘s preference.
The installation will start when you click the “Install” button. During the installation process, the program files will be placed in the correct locations, the configuration will be set and other necessary tasks will be performed.
The goal of the installation is to allow you to run and use the application on your device.
Once the installation is complete, you can open the app immediately if the “Launch NordVPN” option is checked. Otherwise, you will have to open the app manually after pressing the “Finish” button. We will not check the “Install Nordpass” option, this is an installation of another program, a password manager, but it is not necessary to unblock US content on Disney.
-
Create a NordVPN account
Once the NordVPN app has been installed, it’s now time to launch it. First, however, you’ll need to log into the app. So click on “Login”, which will open your web browser.
In the web browser, enter your registration email that you provided during checkout. Once you have entered your registration email, click on the “Continue” button. You will receive a verification code in your e-mail, which you will then enter in the appropriate field.
Once you have entered the verification code, you will be asked to create a password for your account. Enter your new password and click “Create password”.
Once you have successfully created your password, you can click “Continue” to launch the application.
-
Presetting the application
Once you have the NordVPN app running, you can leave the default settings to ensure a secure and reliable connection.
Auto-connect: If you don’t want the VPN to automatically turn on every time you connect to the internet, you can turn off the “Auto-connect” feature. This gives you control over when you want to use the VPN connection.
Kill Switch: We recommend that you leave this feature on. The Kill switch protects your device in the event of a connection failure with the VPN server by automatically disconnecting your device from the internet. This prevents the possible discovery of your true location and IP address.
Threat Protection: this feature provides basic antivirus protection. For the purposes of accessing content on Disney in the US, this feature is not necessary and can be turned off. After making or leaving changes, click “Next” and then “Finish” to complete the application settings.
-
Connecting to NordVPN servers
With the NordVPN app open, click “More connection options” and then navigate to the list of available servers. In the list of servers, you can use the search box and type “United States” or simply scroll through the list until you find “United States”. Alternatively, you can click directly on “USA” on the map.
When you find the desired location in the United States, simply click on it and you will be connected to it. Or you can leave the server selection up to the NordVPN app and simply click on “United States”, which will automatically select the best server at that moment.
When you click on a specific location or use the “United States” option, NordVPN will connect to the selected server in the US. Your virtual location is now in the United States, allowing you to access content and services only available in that country.
-
Watch US content on Disney with NordVPN
After successfully launching Disney, verify that you have successfully unblocked content available only in the US. Once you’ve logged into your account, you’ll see a pop-up window with the message ‘Looks like you’re travelling!’. Click ‘OK’ below this notification, and you can start watching US content on the Disney platform.
To verify that you have successfully unblocked content on Disney that is only available in the US, simply search for any movie or series known to be available only in the US. Once you turn on your VPN, search for the content on Disney . If the movie or show appears, you have successfully unblocked US Disney , when you turn off your VPN and reload the page with content that is only available in America, you will see an error message confirming that this content is indeed only available in the US. By turning it back on and connecting via NordVPN, you will successfully unblock content that is only available in the US.
Tips and Tricks
⚡ Turn on the app and automatically connect through NordVPN when the device starts
To access Disney’s US content without the need to manually launch and connect via VPN, you can simply set the NordVPN app to launch automatically and connect to servers in the US.
Open the NordVPN app and go to settings. In the “General” section, find the “Launch the app at Windows startup” option and make sure it’s enabled. This will ensure the app automatically launches every time your device boots up.
You can also activate the “Launch the app minimized to system tray” option, which will cause the app to launch minimized and not disturb you.
To automatically connect to servers in the United States, go to “Connection” and select “Auto-connect”. Then select “Custom” and search for a server in “United States”. Finally, make sure that the “Auto-connect” option is active.
With these simple settings, the NordVPN app will automatically launch and connect to servers in the United States when your device boots up, allowing you to watch American content on Disney with ease.
🧩 NordVPN Browser Extension
If you prefer to have NordVPN available in your web browser as well, there is an option to add a browser extension based on Chrome, Firefox and Edge platforms.
Click the “Add” button next to the browser extension of your choice, once clicked you will be redirected to the extension store for your chosen browser. From here, add your extension using the “Add” button.
When the extension is installed, click on it to open it in the top right corner of your browser. If you don’t see it there, check the list of available extensions. Once you open the extension, you’ll be prompted to log into your NordVPN account.
After clicking “Login”, enter the email you use with NordVPN. Then press “Continue”, enter your password, and confirm by pressing “Log in”. You are now logged in and can start using the extension.
When the NordVPN extension is running, click on the US flag or search for “United States” in the list of locations. This will connect you to servers located in the US, allowing you to access content that is only available in that country.
In the extension settings, you can turn on automatic connection via VPN when using the browser. Go to settings and then to the “Connection” tab. Here you will find the option to automatically start the connection with the “Auto-connect” function. After enabling this feature, select the “United States” location. This setting will ensure that the NordVPN extension automatically connects to the US server every time you launch your browser.
📱 Watch Disney U.S. from your mobile phone
If you want to watch American Disney content on your mobile device, you can also use NordVPN. Start by visiting the NordVPN website and downloading the app for the Android or iOS platform from the respective app store. After downloading the app, install it on your mobile device.
Once the app launches, click “Already have an account? Log in” and log in by entering the email you used to register with NordVPN, then click “Continue” to enter your account password, once you have filled in your details continue by clicking “Log in”. Once you are successfully logged in, go to the NordVPN app and select “United States” from the menu of available locations. Just click on the US flag and NordVPN will automatically connect you to the US server.
Once you’re connected to the US server, you can launch the Disney app on your mobile device and start watching content that’s only available in the US.
What to do if Disney detects VPN usage
1️⃣ Change VPN server
Occasionally, Disney may block the IP address of a server you are connecting to. However, the solution is simple, just connect to a different server in the US.
In the NordVPN app, click on the list of available countries and search for “United States”. Then choose the specific city you want to connect to and click on that location to connect. Wait for it to connect successfully, also make sure your browser is turned off. If you’ve completed all the steps, it’s time to restart Disney and start watching content only available in the US.
2️⃣ Changing the Protocol
Go into the NordVPN app settings and select the “Connection” section. Here, change the “VPN protocol” setting to one of the available protocols and confirm the change. Then connect to the VPN server in the US. Make sure you are successfully connected to the server using the new protocol. Once you’ve completed these steps, you can safely launch Disney and start enjoying the content available in the US.
3️⃣ Contact NordVPN Support
If you’re still experiencing issues connecting to Disney using NordVPN, we recommend contacting their customer support. Visit NordVPN and click on the chat icon in the bottom right corner of the screen. This will connect you directly with their support team. Describe your problem here and customer support will provide you with immediate help and solutions. Alternatively, you can contact support via email at support@nordvpn.com.


